
Cloudflare R2 是一款高性能、低成本的对象存储服务。之前在使用 OSS 的时候,用惯了 OSS brewer, 在用 R2 时候发现,开始没有找到合适的 brewer 工具,而网页端上传会限制文件数量和大小,就尝试用命令行的 client 了哈哈, 使用之后发现,确实好用,相比使用网页管理对象存储,利用命令行工具可以大大提高管理效率,特别适合需要批量操作或脚本化的场景。
评论老哥分享了一个 client 工具: https://cyberduck.io/ 我尝试用下试试~
安装 rclone
sudo -v ; curl https://rclone.org/install.sh | sudo bash
查看 config 文件识别的地址
rclone config file
# Configuration file doesn't exist, but rclone will use this path:
# /Users/xxx/.config/rclone/rclone.conf
# 编辑文件配置
vi /Users/xxx/.config/rclone/rclone.conf
[testConfig]
type = s3
provider = Cloudflare
access_key_id = abc123
secret_access_key = xyz456
endpoint = https://<accountid>.r2.cloudflarestorage.com
acl = private
这里我创建了一个名为 bucket 的桶
所需的 access_key_id 和 secret_access_key 需要另外申请: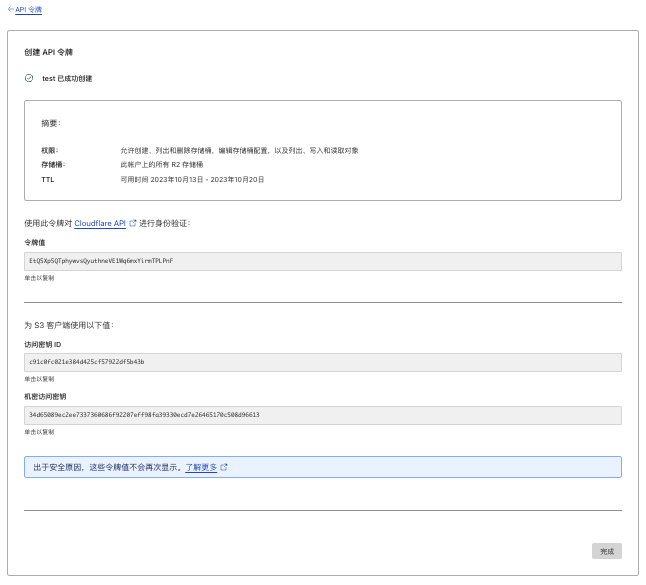
设置完成后,就可以对 cloudflare 的桶资源进行管理了。
列出存储桶和对象
# 列出所有存储桶:
rclone lsd testConfig:

# 列出所有桶及内部目录文件
~ rclone tree testConfig:
  ...

# 列出指定桶及内部目录文件
~ rclone tree testConfig:bucket
/
└── 2023
    ├── 08
    │   ├── 1690960360295.png
    │   └── 1692713312723.png
    ├── 09
    │   ├── 1693822893.jpg
    │   └── 1694588667.png
    └── 10
        └── 1696911351.png

# 创建新桶:
rclone mkdir testConfig:bucket

# 删除空桶:
rclone rmdir testConfig:bucket

# 列出对象列表:
rclone ls testConfig:path
# 计算对象存储总量:
rclone size testConfig:path
上传和检索对象
# 上传本地文件或目录:
# rclone copy [目录或者文件] test:桶名+路径
rclone copy helloworld testConfig:bucket

# 查看
rclone tree testConfig:bucket

# 下载对象到本地:
# rclone copy test:桶名+路径 本地目标路径
rclone copy testConfig:bucket/README.md .

# 删除
# rclone delete test:桶名+路径
rclone delete testConfig:bucket/README.md

# 更多
rclone --help
评论